(416) 250-6856
 contact@drywalltoronto.ca
 Mon-Fri: 8AM - 4PM

Drywall Repair Tips Every Homeowner Should Know in 2026
In 2026, Express Drywall Services recommends that homeowners approach drywall repair with the right materials, tools and techniques to ensure lasting results. Choosing suitable drywall – such as moisture-resistant or fire-rated options – helps improve durability and safety. Small dents can be fixed with lightweight spackle, while larger holes require joint compound and mesh support.
Proper surface prep, sanding and priming are key for smooth finishes and long-term paint adhesion. To prevent future damage, consider upgrades like corner guards, soundproofing or reinforced framing – services we proudly offer as part of our full-service approach. These drywall repair tips every homeowner should know will help maintain strong, beautiful walls for years to come.
Choosing the Right Drywall Materials
Selecting the appropriate drywall materials is essential for successful repairs and long-term durability. Homeowners should consider the specific needs of their project, such as choosing between regular, moisture-resistant or fire-rated drywall. Additionally, understanding when to replace versus repair existing drywall can save both time and costs, while having the right tools and materials guarantees efficiency in DIY projects.
Types of Drywall: Regular, Moisture-Resistant and Fire-Rated
When considering drywall options for a construction or renovation project, it’s essential to understand the specific types available to secure peak performance in different environments. Choosing the right type guarantees durability, safety and effectiveness in meeting specific construction needs.
- Regular drywall is versatile and apt for standard residential and commercial applications.
- Moisture-resistant drywall, often called “green board,” is designed for high-humidity areas like bathrooms and kitchens, where water exposure is a concern.
- Fire-rated drywall, also known as “Type X,” offers enhanced fire resistance, making it suitable for areas requiring added safety measures, like garages or furnace rooms.
When to Replace vs. Repair Existing Drywall
How can one determine whether it’s time to replace or simply repair existing drywall? The decision hinges on several factors. Significant water damage, extensive mold growth or large holes may necessitate replacement due to compromised integrity. Conversely, minor issues like small cracks, holes or dents can often be repaired effectively. Evaluating the extent and cause of the damage is essential.
Repeated repairs on the same area could indicate underlying issues requiring full replacement. Additionally, considering the age of the drywall and potential future renovations can influence the choice. Professional evaluation guarantees the most cost-effective and durable solution.
Tools and Materials Every DIYer Should Have
For those starting on a drywall project, having the right tools and materials is fundamental for achieving a professional finish. Key tools include a utility knife for cutting, a taping knife for smoothing and a sanding block for finishing. A drywall saw is critical for precise cuts, while a T-square guarantees straight edges.
Essential materials encompass drywall sheets, joint compound for seams and drywall tape to reinforce joints. Selecting the right drywall type is significant; moisture-resistant drywall is recommended for bathrooms, while fire-resistant options suit kitchens. Proper preparation with quality materials guarantees a durable and aesthetically pleasing outcome.
Preparing the Area for Repair
Before commencing drywall repair, thorough preparation of the area is essential to guarantee a successful outcome. Confirming the space is clean and free from obstructions allows for an efficient workflow. Furniture and decorative items should be moved or covered to protect them from dust and debris. The repair area must be adequately lit, providing clear visibility for precise work.
Identifying and marking the damaged spots confirms focused attention during the repair process. Additionally, turning off power in the affected area prevents electrical hazards. With everything ready, one can proceed confidently, knowing the groundwork has been meticulously laid for effective repairs.
Techniques for Fixing Small Dents
Addressing small dents in drywall requires a straightforward approach to restore a smooth surface. First, one should gently sand the area around the dent to remove loose debris and create a clean working surface. Next, apply a thin layer of lightweight spackle using a putty knife, ensuring the dent is filled evenly. Allow the spackle to dry completely before lightly sanding again to achieve a seamless finish. A primer can be applied to prepare the area for painting.
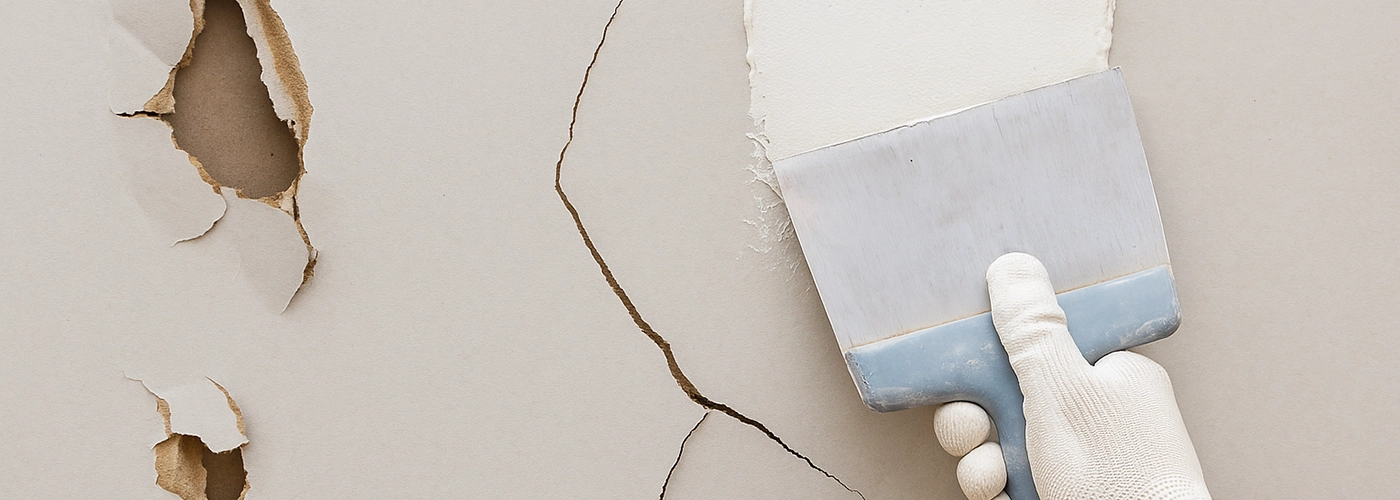
Repairing Large Holes and Cracks
When addressing large holes and cracks in drywall, homeowners have several patching methods to evaluate, including mesh tape, backing boards and drywall plugs. Properly securing the patch is vital to maintaining the structural integrity of the repaired area. To guarantee a successful outcome, it is important to be aware of common mistakes often made during bigger repairs, such as using inadequate support or incorrect materials.
Patching Methods: Mesh Tape, Backing Boards and Drywall Plugs
Repairing large holes and cracks in drywall requires effective patching methods, such as mesh tape, backing boards and drywall plugs. Each method guarantees a smooth, resilient surface, essential for maintaining the integrity and appearance of interior walls.
- Mesh tape is ideal for reinforcing seams and preventing future cracking. It is applied over the damaged area, offering a sturdy base for joint compound.
- Backing boards are used for larger holes, providing structural support by securing them behind the drywall before patching.
- Drywall plugs, pre-cut and ready to use, fit snugly into holes, making them perfect for quick repairs.
Securing the Patch for Structural Integrity
Effective patching methods like mesh tape, backing boards and drywall plugs lay the groundwork for a solid repair, but guaranteeing the patch’s structural integrity is the next critical step in the process. Achieving this involves securely fastening the patch to stabilize the surrounding drywall.
First, applying joint compound generously around the edges helps bond the patch. Pressing firmly eliminates air pockets and guarantees a seamless connection. Next, screws should be strategically placed to reinforce the patch, preventing future movement. Finally, a second coat of joint compound smooths the surface, ensuring it adheres properly, providing both durability and a flawless finish.
Common Mistakes to Avoid with Bigger Repairs
Addressing large holes and cracks in drywall can be challenging, particularly for those unfamiliar with the intricacies of bigger repairs. Common mistakes include using inadequate support for patches, which can lead to sagging or further damage. Homeowners often neglect to smooth the edges of the existing drywall, resulting in visible seams.
Incorrectly mixing or applying joint compound can cause uneven surfaces or extended drying times. Failing to apply a primer before painting can lead to mismatched textures and colors. Properly preparing the area, selecting the right materials and following a structured repair process can help avoid these pitfalls.
Understanding Joint Compound Application
Joint compound, often referred to as “mud,” plays an essential role in achieving seamless drywall finishes. It is a versatile mixture used to cover joints, embed tape and conceal screw holes, ensuring a smooth surface ready for painting. Applying joint compound requires precision and patience, as it is vital to spread it evenly across seams and indentations.
Typically, several layers are needed, with adequate drying time between applications to prevent cracking. Using a broad putty knife or trowel aids in achieving even layers. Properly mixed and applied, joint compound transforms patched surfaces into flawless, uniform walls, enhancing any living space.
Sanding for a Smooth Finish
Although often overlooked, sanding is a critical step in drywall finishing that determines the final appearance of the surface. Express Drywall Services emphasizes the importance of using the right sanding tools and technique. For ideal results, a sanding pole with fine-grit sandpaper is recommended to achieve a smooth, even surface.
Homeowners should verify the plaster is dry before sanding to prevent damage. With gentle, circular motions, sanding should be approached with care to avoid creating depressions or uneven spots. Adequate lighting reveals imperfections, making it easier to address them. Proper ventilation and protective gear are essential for safety during the process.
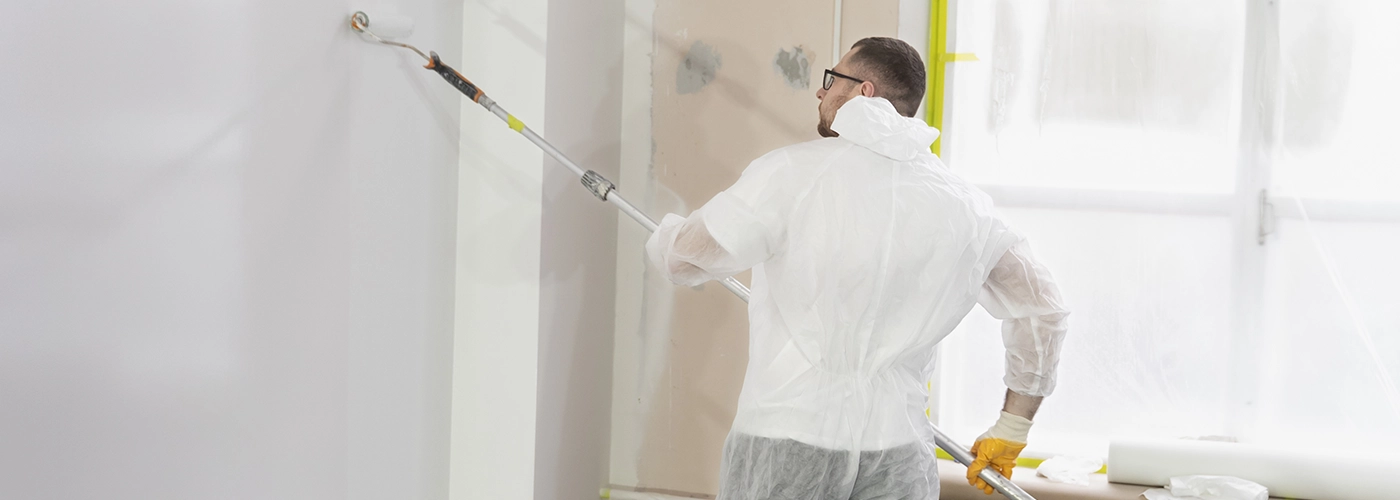
Priming and Painting the Repaired Surface
Properly priming and painting a repaired drywall surface is vital to achieving a seamless finish. Priming is essential after repair as it seals the patched area, ensuring uniform paint absorption. Selecting the right primer and employing effective paint blending techniques can make the repair virtually invisible, restoring the wall’s original appearance.
Why Priming Is Essential After Repair
Priming is an essential step after drywall repair because it prepares the surface for painting and guarantees a uniform finish. The process secures the longevity and appearance of the final coat. Here’s why priming is indispensable:
- Seals the Surface: Primer acts as a sealant, preventing moisture from penetrating the drywall and protecting the repair work.
- Enhances Paint Adhesion: It creates a smooth base that improves the adherence of paint, reducing the risk of peeling or flaking.
- Masks Imperfections: Primer conceals small imperfections, ensuring the repaired area blends seamlessly with the existing wall.
- Color Consistency: It helps achieve a consistent color, avoiding patches or discoloration.
Choosing the Right Primer for Repaired Drywall
Selecting the ideal primer is vital for ensuring that repaired drywall achieves a flawless finish. Homeowners should consider the type of drywall repair and the drywall’s location. For new drywall patches, a high-build primer is recommended as it effectively seals and smooths the surface. In areas with moisture, such as bathrooms, a moisture-resistant or mold-inhibiting primer is essential to prevent potential damage.
Additionally, using a stain-blocking primer can cover any discoloration from previous repairs. A quality primer not only enhances paint adhesion but also provides a uniform surface, ensuring the repaired area blends seamlessly with the surrounding wall.
Paint Blending Techniques to Hide the Repair
How can homeowners guarantee a seamless finish when painting over repaired drywall? Mastering paint blending techniques is vital. To achieve this:
- Select Matching Paint: Use the exact color and finish originally applied. Test a small patch to confirm compatibility.
- Feather the Edges: Gently extend the paint beyond the repair area, using a light hand to blend smoothly into the existing surface.
- Layer Gradually: Apply multiple thin coats rather than one thick layer. This prevents noticeable edges and promotes even coverage.
- Finish with a Roller: Use a roller for the final coat to mimic the original texture and avoid visible brush strokes.
Preventing Future Drywall Damage
Preventing future drywall damage begins with understanding common causes such as moisture, accidental impacts and foundation settling. Homeowners can protect high-traffic areas by installing corner guards or using washable paint. Regular inspections can help identify potential issues early. In cases where underlying structural problems are suspected, consulting a professional for long-term solutions is advisable.
Common Causes of Drywall Damage in Homes
Drywall, a fundamental component of modern homes, often faces damage due to a variety of common factors. Understanding these can help in preventing future issues.
- Moisture Exposure: Leaks or high humidity can lead to water damage, causing warping or mold growth.
- Accidental Impacts: Everyday activities, such as moving furniture, can cause dents or holes.
- Structural Settling: Over time, homes naturally settle, which may result in cracks in drywall.
- Poor Installation: Inadequate installation techniques can lead to weak spots and eventual damage.
Tips to Protect High-Traffic Areas
Recognizing the common causes of drywall damage, homeowners can take proactive steps to protect high-traffic areas and minimize future issues. Installing corner guards is an effective strategy to shield vulnerable edges from impact. Regularly checking for leaks or signs of moisture prevents water-related damage, while applying a durable coat of paint enhances surface resilience.
Utilizing furniture pads can mitigate scuff marks and scratches from frequent contact. Rearranging furniture to minimize direct contact with walls reduces the risk of wear. For homes with children or pets, designating play areas away from walls can further preserve drywall integrity.
When to Call a Professional for Long-Term Solutions
How do you know it’s time to stop patching and call in the pros? At Express Drywall Services, we help homeowners across the GTA prevent recurring damage with expert repair and full-service drywall solutions. Here’s when professional help becomes essential:
- Extensive Water Damage. If your drywall has been exposed to flooding or ongoing leaks, it may be hiding moisture, mold or rot. Our team provides moisture-resistant drywall installation and complete remediation to restore your space safely.
- Structural Cracks. Large or repeating cracks could signal deeper framing or settling issues. We assess and reinforce the structure as needed with framing (wood and steel stud) services and proper wall assembly.
- Fire Damage. Burnt or smoke-damaged drywall must be replaced with care. We offer fire-resistant drywall installation and can also assist with fire and sound separation between units for enhanced safety and compliance.
- Persistent Mold Issues. If mold keeps coming back, surface cleaning won’t solve the problem. We identify root causes and rebuild using mold-resistant materials, insulation upgrades and professional priming and painting to seal the surface.
At Express Drywall Services, we go beyond basic patch jobs – offering everything from taping and mudding to soundproofing, drop ceilings and custom archways. If you’re facing drywall problems that just won’t stay fixed, it’s time to bring in the experts who do it right the first time.