(416) 250-6856
 contact@drywalltoronto.ca
 Mon-Fri: 8AM - 4PM

Shaft Wall Assembly — What It Is and When It’s Required in Ontario
If you’ve ever looked at the drawings for a mid-rise build and seen “shaft wall assembly” on a detail sheet, you probably already know it’s not optional. But if you’re newer to commercial construction — or managing a renovation that suddenly touches an elevator core or mechanical chase — it’s worth understanding what a shaft wall actually is, why Ontario’s building code mandates it, and what goes into doing it right.
We’ve installed shaft walls on projects ranging from Vaughan office towers to mixed-use builds in Etobicoke. Here’s what we’ve learned.
What Is a Shaft Wall?
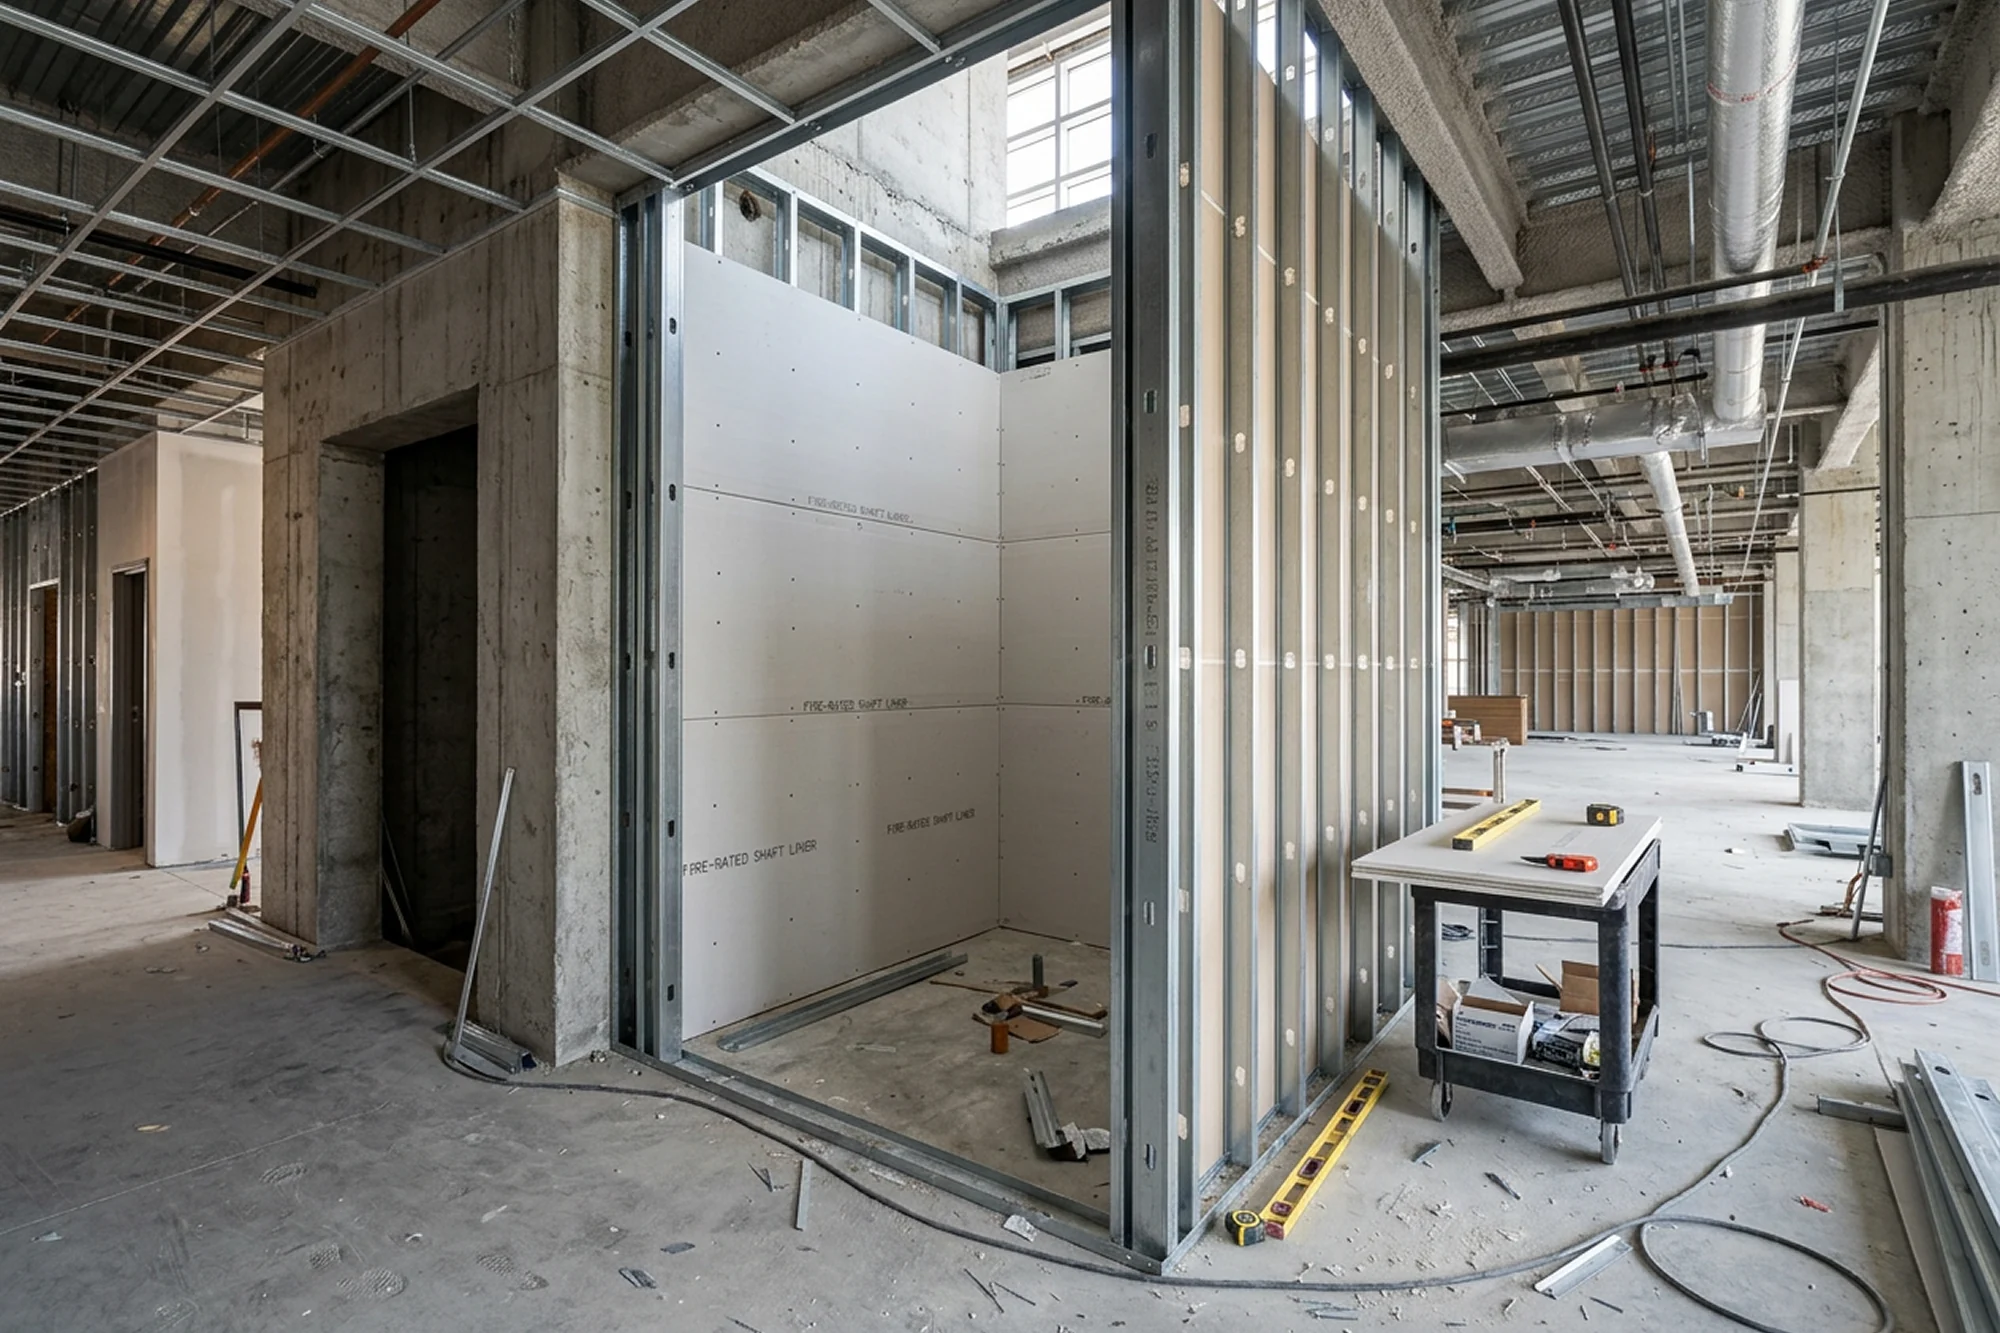
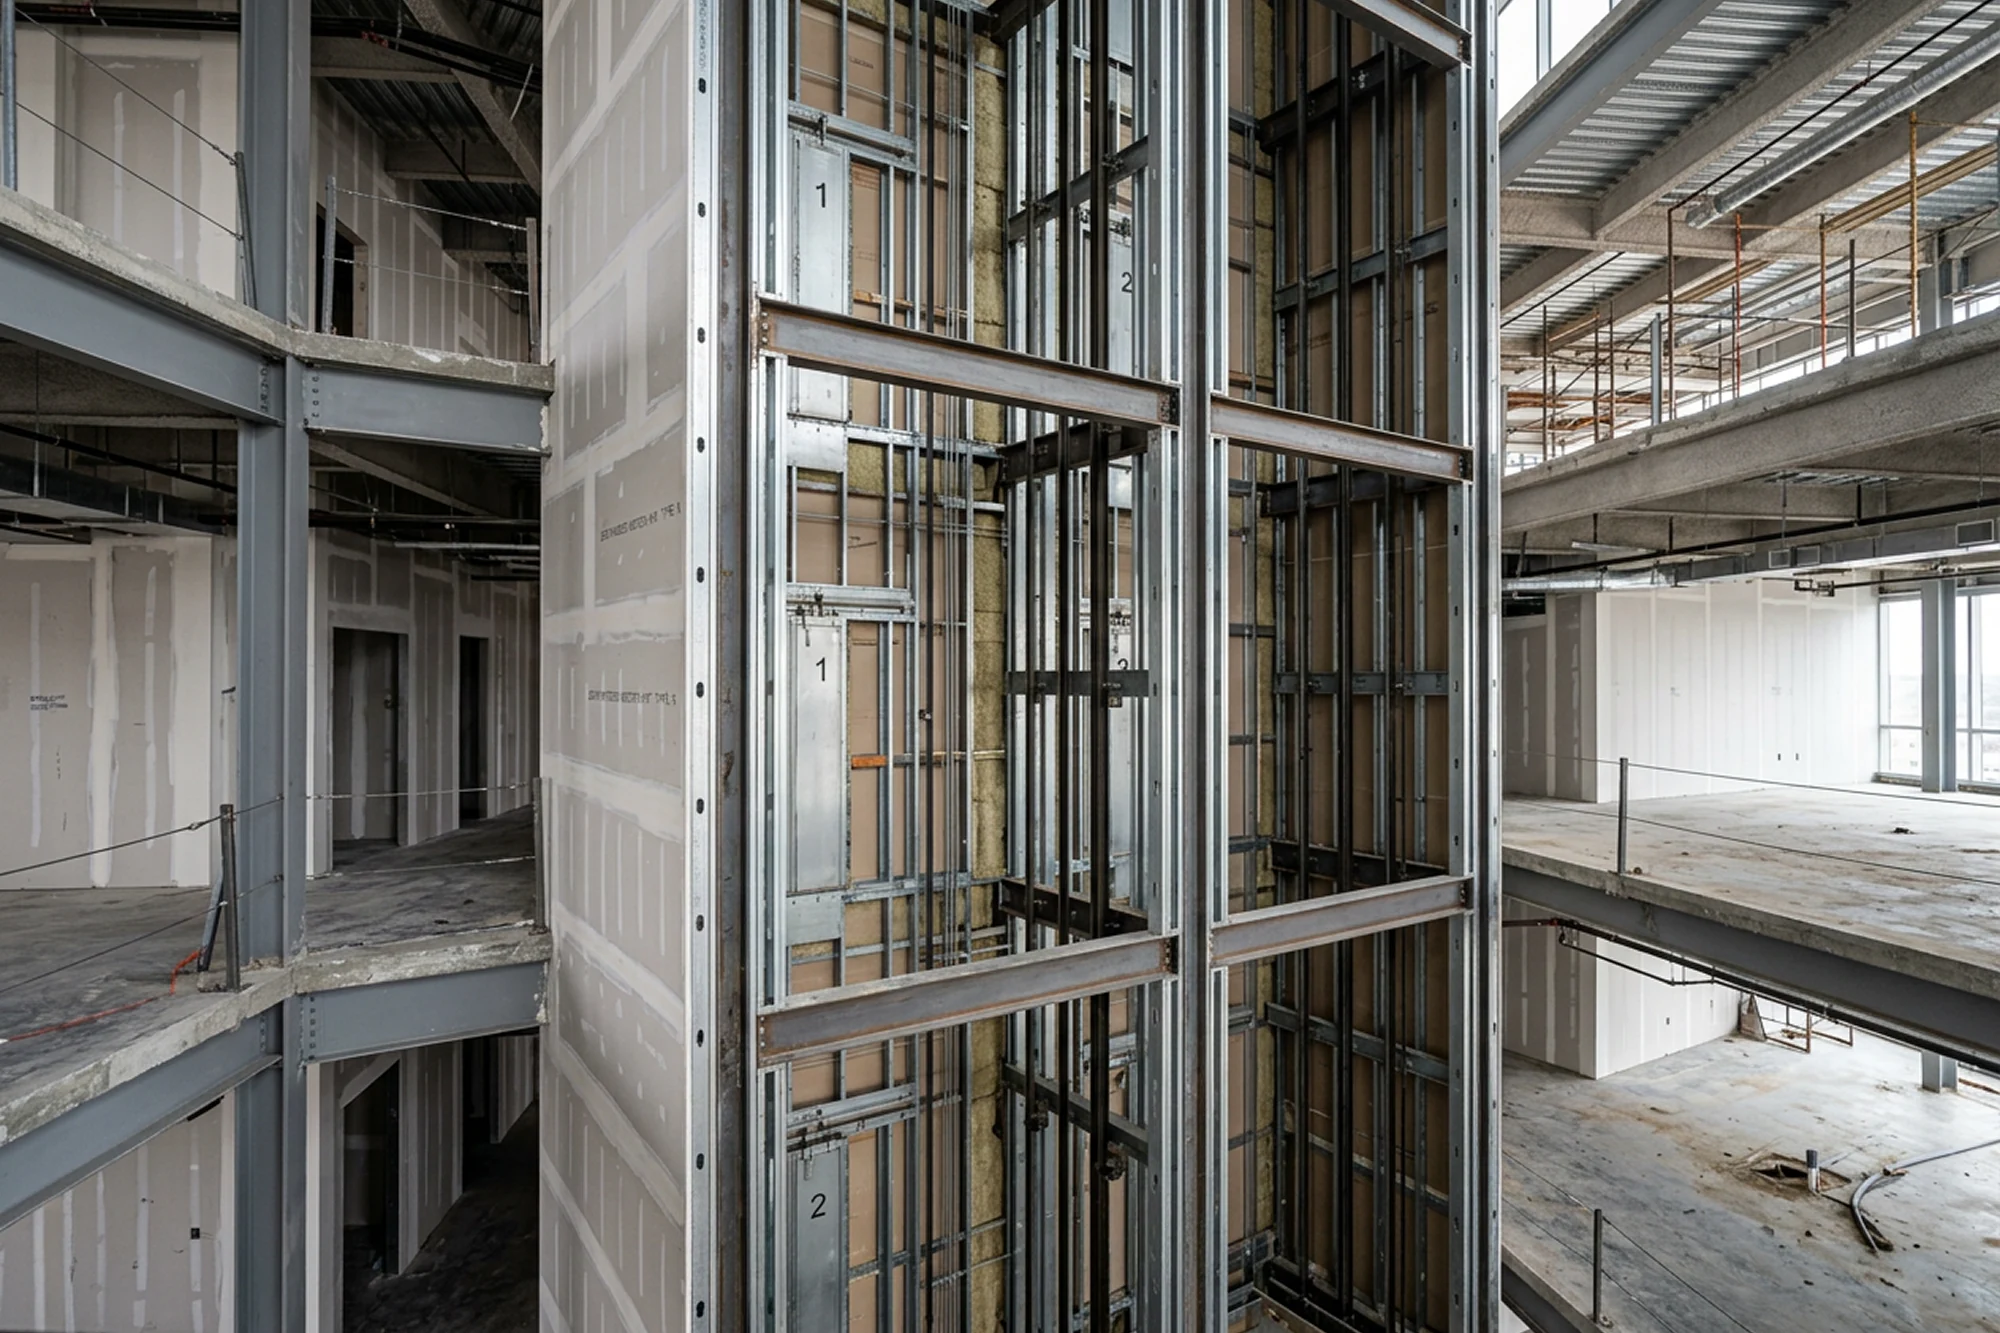
A shaft wall is a fire-rated drywall assembly used to enclose vertical chases inside a building — elevator shafts, stairwells, mechanical runs, duct shafts, and similar spaces. Unlike a standard partition wall, a shaft wall is built entirely from one side, because the interior of the shaft is inaccessible once construction proceeds past a certain point.
That one-sided installation constraint is what makes shaft walls distinct. You can’t frame both faces and infill the middle. The system has to be structurally self-supporting from a single face, using components specifically engineered for that purpose.
The Basic Components
A standard shaft wall system includes:
- C-H studs — special I-shaped or H-profile steel studs that slot into floor and ceiling tracks
- Liner panels — 1-inch gypsum board panels inserted into the stud channels before the face layer goes on
- Face layers — typically two or more layers of Type X drywall applied to the accessible side
- Continuous tracks — floor and ceiling runners that anchor the assembly and transfer load
The liner panels slot vertically between the C-H studs and are held in place by the stud flanges — no fasteners on the liner itself. The face layers go on last, screwed to the stud faces. When properly assembled, the system resists fire from both sides despite only being installed from one. It’s a bit like building a ship in a bottle: the order of operations is everything.
Rated Assemblies vs. Generic Drywall
This is worth saying clearly: a shaft wall is not just drywall on steel studs. It’s a tested, listed assembly — typically ULC-certified — with a specific combination of components that produce the rated fire resistance. You can’t swap materials in and out and expect the rating to hold up. If the system spec calls for 1-inch liner board, half-inch liner is not an acceptable substitution, even if the face layer counts are the same.
When the Ontario Building Code Requires It
The Ontario Building Code (OBC) is specific about shaft enclosures. Under Part 3, buildings of certain occupancy types and heights require rated shaft assemblies wherever a vertical opening penetrates a floor assembly. The logic is straightforward: unenclosed shafts act as chimneys in a fire, pulling flame and smoke upward through the building rapidly. The shaft wall exists to stop that.
Here’s when a shaft wall is required:
| Condition | OBC Requirement |
| Elevator shafts in buildings over 2 storeys | Fire separation — minimum 1-hour rating |
| Mechanical/duct shafts penetrating floor assemblies | Fire separation — typically 1-hour minimum |
| Stairwell enclosures (exit stairs) | 1- or 2-hour depending on building height |
| Service shafts in Group A, B, C, D occupancies | Rating per floor assembly and occupancy type |
The required rating — 1-hour or 2-hour — depends on building height, occupancy group, and the nature of what’s running through the shaft. When in doubt, cross-reference Section 3.1 of the OBC. Your building official will be doing exactly that.
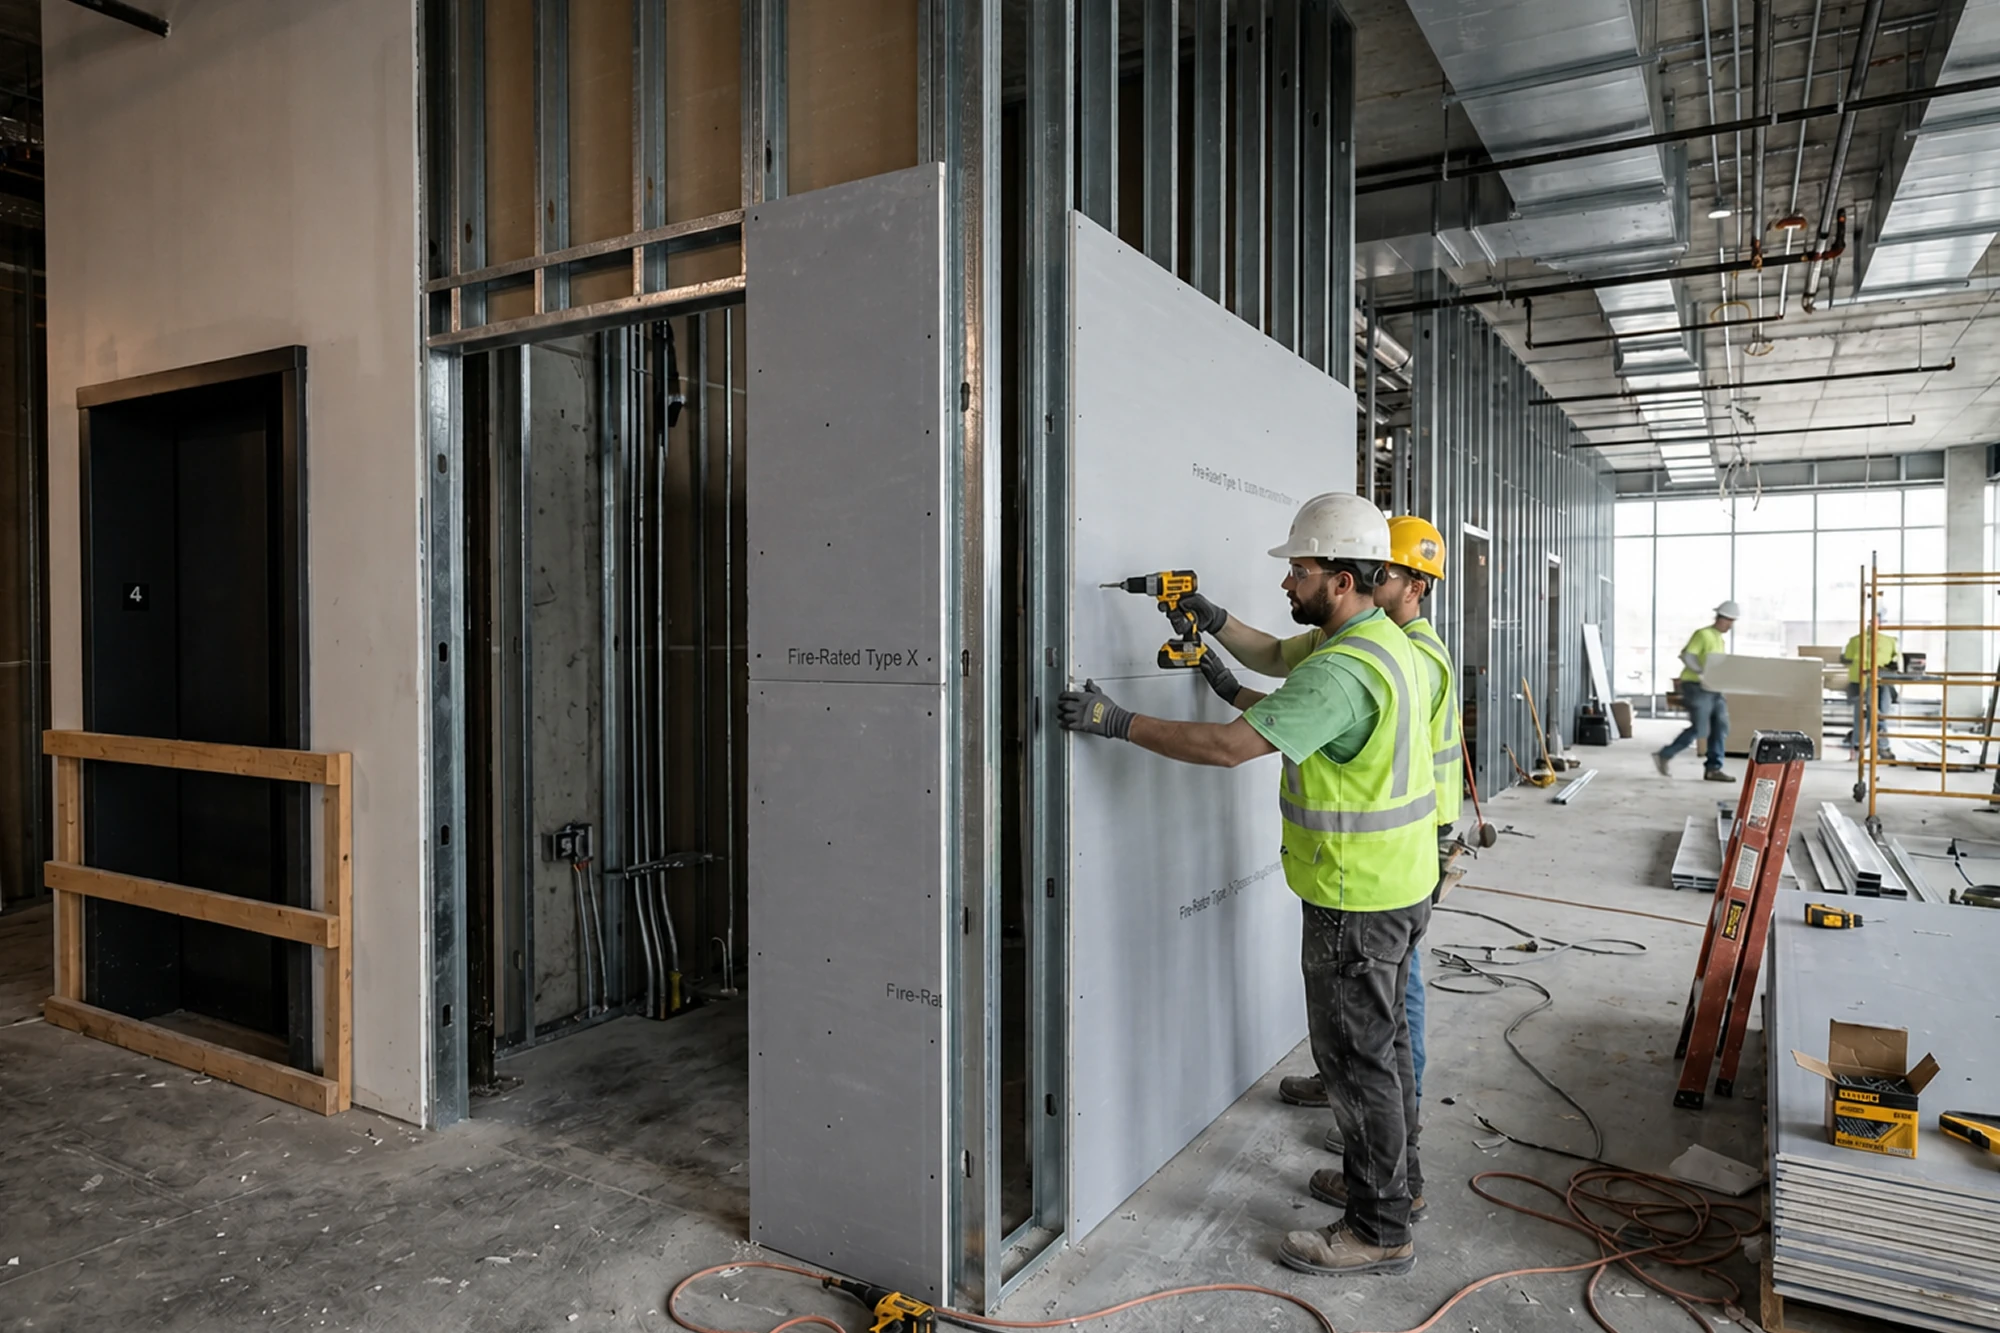
How Shaft Wall Installation Actually Works
This is where it gets practical — and where mistakes happen if crews aren’t experienced with the system. The sequence of steps is not flexible. Get it wrong and you’re re-doing work.
Step 1 – Track Installation
Floor and ceiling tracks are installed first, anchored at both levels. Track positioning has to account for the finished face dimension — the tolerances are tighter than in standard partition framing.
Step 2 – Liner Panel Insertion
Liner panels are stood vertically inside the track before the studs go in. Liner first, then stud. Reversing the order is a common mistake on crews doing their first shaft wall — and it wastes a lot of time correcting.
Step 3 – C-H Stud Placement
C-H studs slip over the liner panels and engage the tracks. Stud spacing is typically 24 inches on center for standard assemblies, though high-load applications may require closer spacing. Follow the tested system spec — not intuition.
Step 4 – Face Layers
Face drywall goes on the accessible side in multiple layers, with joints staggered between layers. Screw pattern and depth matter. Under-driven screws don’t hold; over-driven screws break the paper face and lose holding power. Both are easy to miss on a fast-moving commercial project.
Step 5 – Firestop at Penetrations
Any penetration through the shaft wall — conduit, piping, duct sleeve — requires a listed firestop product installed to spec. This is inspected. We handle fire caulking as part of our shaft wall scope on most projects, because leaving penetrations to a third party creates coordination gaps and delays at inspection.
Common Errors We See in the Field
Twenty years of commercial drywall work across the GTA means we’ve inherited our share of problematic assemblies. The issues we see most often:
- Incorrect stud profile. Standard drywall studs are not a substitute for C-H shaft studs. The geometry is different. Substituting standard studs voids the tested assembly and fails inspection. Always.
- Liner panels cut short. Liner panels need to run full height, floor to deck. Short cuts leave gaps at the head track that compromise the fire rating. It’s a small detail that’s easy to rush when a crew is pushing to meet a frame inspection date.
- Wrong or missing firestop at penetrations. The ULC-listed firestop product has to match the specific penetration type — rigid pipe, conduit, flexible duct — and the substrate. Using the wrong product or skipping the backer rod is one of the most common reasons a shaft assembly fails its inspection.
- Face layer joints not staggered. Both layers of face drywall need staggered vertical joints. Aligned joints create a seam path that weakens the assembly structurally and reduces fire resistance. The spec is clear on this. It still gets missed.
Shaft Wall vs. Standard Partition — A Quick Comparison
Contractors sometimes ask whether a standard double-layer Type X partition can substitute for a shaft wall in a pinch. Short answer – no.
| Feature | Shaft Wall Assembly | Standard Partition |
| Installation access | One side only | Both sides required |
| Structural behaviour | Self-supporting from single face | Relies on bilateral framing |
| Components | C-H studs + liner panels | Standard C or S studs |
| ULC listing | Required — specific system | Standard assemblies |
| Common use | Elevator shafts, stairwells, chases | Interior walls, suite separations |
A standard partition isn’t engineered for single-sided installation. Using one in a shaft application doesn’t just create a performance risk — it fails inspection.
Ready to Quote Your Shaft Wall Scope?
Express Drywall Services provides free on-site estimates within 48 hours, across 35+ cities in the Greater Toronto Area. We’ve completed shaft wall installations on commercial projects from Hamilton to Barrie, with 20+ years in the trade and a 1-year warranty on all work.
Call us at (416) 250-6856 or contact us at expressdrywallservices.com. Detailed, itemized quotes — no hidden fees, no surprises.